2013-03-23

Simpler Servo Bed

Well, I got bad news for those who bought the HK15298 servos for the forarms. It seems these digital servos have a restricted rotation from 0 to 90° which doesn't let the fingers do their complet movement.
There is search going on at the moment to see if we could reprogram them to get a rotation of 0 to 145°, but it won't be an easy thing, I think.

So if you are about to buy these servos, try to get some others with a 0 to 180° rotation like the analog MG995 I had at first.

This has lead me to design another bracket system.

As it was in my previous version the servos were set sideways, and we could have a total of 5 servos.


The space between the bottom actuator and the robpart was really small


I wanted to create some printed actuator rings with a bigger diameter which would allow restricted servo rotation to get more pulling developpement. So I turned all the servos up,  this way I get more space and actually it all comes out more fonctionnal. I remember when I first designed the forarm brackets, how much time it took me to create it. It was insane.
This went actually pretty fast.


 I have uploaded it on Thingiverse.
You can get here.
You don't need to reprint the "robparts", it can just fit in. You only need to remove two little parts with a plier and it all should go nicely. Fixing the fishing braid will be an easy task, done with a few nots.
The nice thing about this, is that we can have an extra servo in the forarm now. That's a total of 6 servos. With a bit of redesign we could even have 7 servos in there.
We can actuate the thumb with this derivative or create something to move up and down the wrist.
I haven' t tried to print it yet, since I don't need it,  but I think it should be fine.
The assembly is pretty straight forward.
Have fun!


2013-03-08

Jaw Mechanism

Jaw mechanism is uploaded on Thingiverse.

I have done the complete step by step for the assembly of the neck and jaw. This should get you going.
Check the "Assembly help" tab.

There might be some stuff to modify but it works in my InMoov robot like this for now, and I'm not going to review it all again so you might as well try it like this.
Remember if you decide to modify some parts, there is the eye mechanism, still to come in there.

I hope you have fun building this, sometimes I which I was you guys. What took me a month to create, you just print it and put it together. I'm getting a bit jealous...

Please post your pictures on Thingiverse otherwise I don't keep posting parts!

Sometimes I find people building InMoov, posting pictures on their own blog or site and making modifications and not sharing their work. Not even attributing the parts to InMoov.


This "was" the exemple of what I meant. What do you think about that?
At the time I put this link their post has been modified. 

So thanks to them.
I hope, we hope, we all hope they will put their derivatives files for download.  

Okay, Gael calm down. 

Giving is the best gift you can get.


2013-02-27

Neck for InMoov

You can now download the neck with the mechanism that makes the head tilt and pan. 
Get it on Cubehero.
Okay, I guess this is going to be like this. The head contains many parts, so I divised in different sections.
Neck
Skull
Ear
Jaw
Eyes 
There is a part of the skull that is necessary for to do the final mounting of the neck mechanism with servos, it is situated at the rear of the head. I made a piece called "temporary", which you will withdraw once I upload the skull.
I have to make the step by step of the neck, pictures are done, but I need to write the text.
Hope you enjoy it.


2013-02-24

InMoov gets surprised!

When I said to my wife, Grog (MyRobotLab) and I have decided it was time to start teaching InMoov, and for that matter I should be looking for colorful objects, she started to become sneaky.

Everytime I was coming in our room she was hidding stuff, or it seemed so.

Tonight the mystery was revealed!
InMoov had is own little toy robot!

Isn't that great, I had to post it. I think it's so cute that InMoov is going to learn very fast how to grab it.

I love the eyes and hook on the head. 
 
Too bad it can't be printed, as I'm sure many of you would like to have it for further test on InMoov or just to have with you during your hard moments of life.


InMoov's little toy front

InMoov's little toy side

InMoov's little toy close up

2013-02-22

InMoov makes the front cover.

A few months ago I was asked by an American set designer, if I would let them use InMoov hand for to make the front cover of The Atlantic magazine.
Attribution is to be expected inside the magazine. Behing abroad, I have not the chance to buy it for to check it out.

Looking at the result, they did a good job on the finishing touch. If I remember correctly, it was printed in PLA with a 0.3mm thickness. They did a finishing coating with paint, but I would guess they had to use a primer with a good sanding job.

Here is the article of CNN, which came out a few weeks ago.


Photo Bart Cook

Photo Bart Cook

2013-02-18

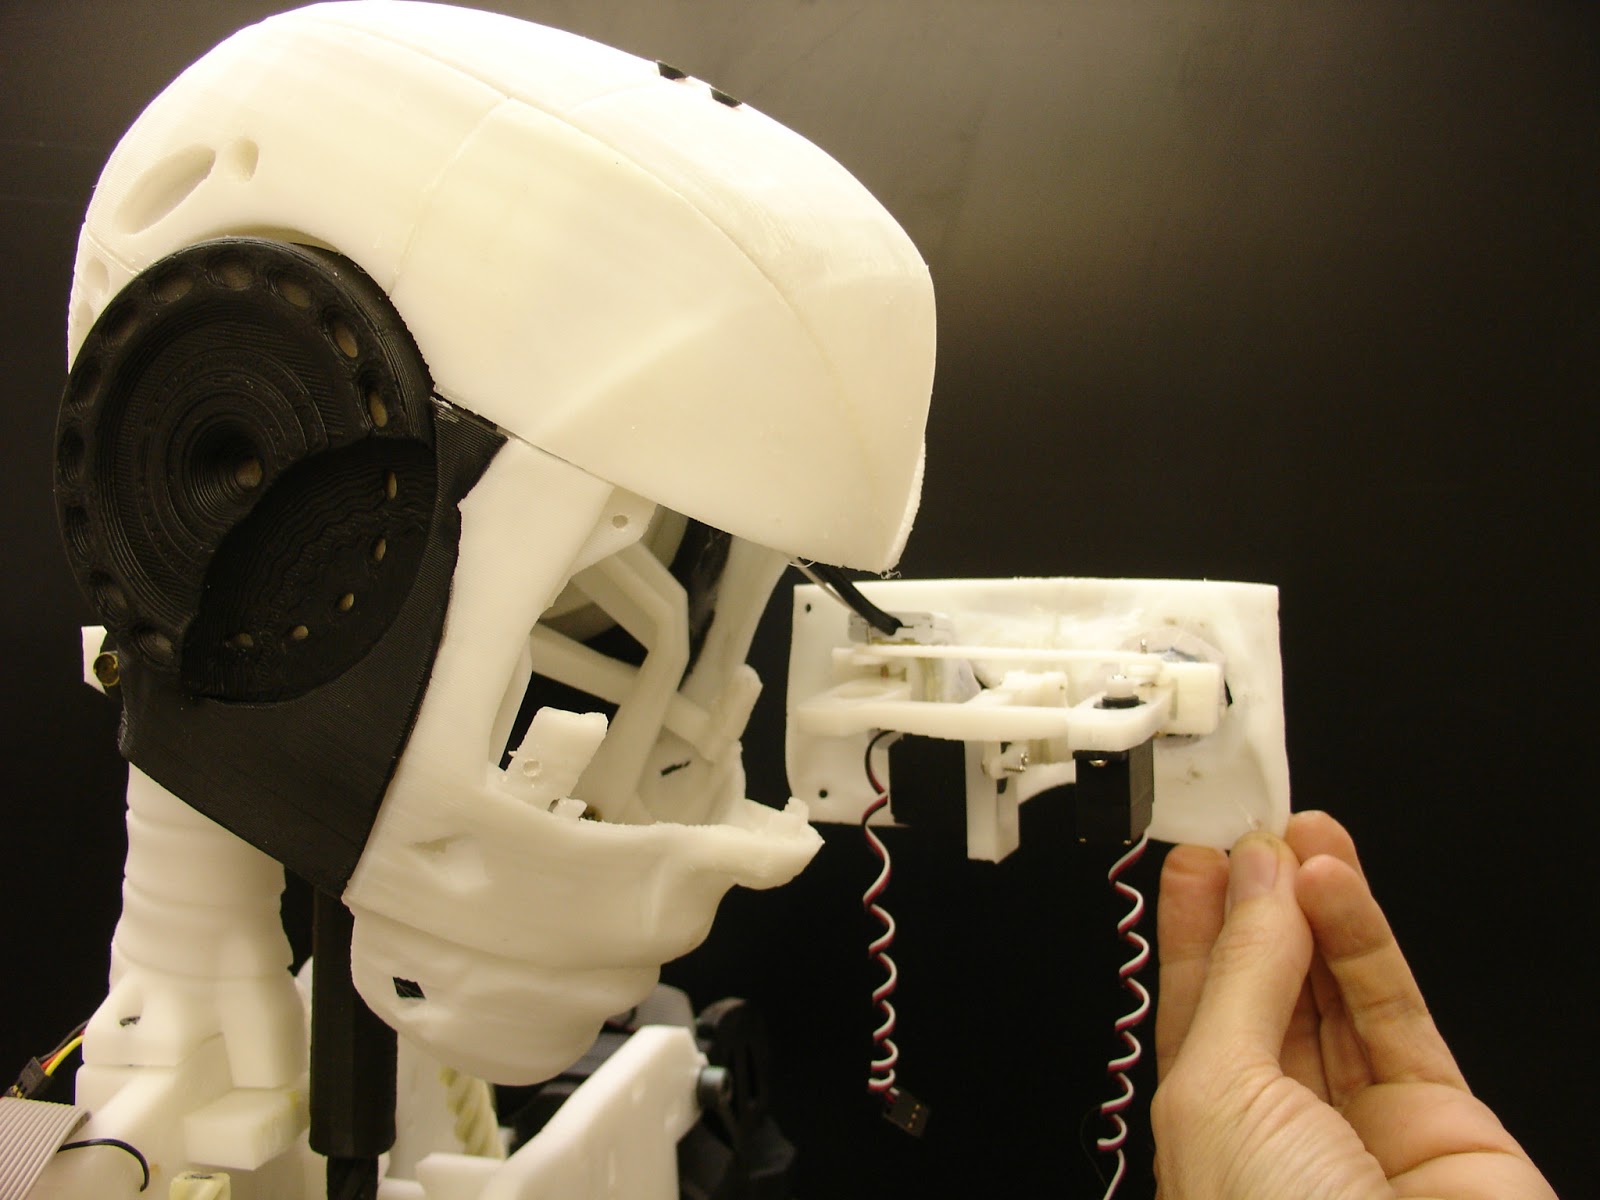
Eye Mechanism

Funny how a little mechanism like this can be difficult to create. It is mainly due to the space where it all has to fit.Although I used small XGD-11HMB servos, they still appear big in there. 
I had done a first mechanism, but every part were just too fragile and flexible. 
So okay, I decided to review it all and turn the bottom servo in another position to get it in there with extra thickness in all the plastic parts.

It is still a bit wobbly.

There is a space for a third servo on the second eye, if one wants to have eyes that wouldn't move simultaneously, Brrr scary freak.

I dismantled the rubber part of my Hercule HD camera and kept only the hard plastic angle which contains the camera. I had previously extracted the microphone and added extra length on the wires, in order to have the microphone in the ears. As you probably have read in some earlier post, sound is a difficult part, which I tend to put further in the future, when I really get extra info. For now a simple bluetooth head set microphone does the trick, between me, the PC and InMoov.

My Hercule HD camera is hot glued on the template support where it belongs on the eye mechanism. On the other template, I could set another camera. But for now, I just did two photocopy papers glued on the mobile template and on the Hercule camera. It isn't fancy, but having only one eye, made him look scary, and I couldn't leave the poor guy like that.

Now, I need to plug that and try to see what happens! 
Isn't that fun!
 
InMoov eye mechanism, inside view
InMoov eye mechanism, side view
InMoov eye mechanism, front view
InMoov eye mechanism, front view. You can see here the jaw mechanism. 


2013-02-11

Printing parts

Like I said on the forum two weeks ago, after the request of builders without printers, I contacted a Printing service which I work with sometimes, I knew their prices would be high...
So, I finally got prices from them. The news isn't so great.
Prices are too high to my taste. Way too high.You might as well buy yourself a printer and start printing, you would be better off. The two arms + torso comes in a range of 3000 euros.

The goal of InMoov is to be built at a reasonable price for most DIYers. 
While printing on your own machine there is the cost of electricity and materials of course. Time consuming doesn't cost you if you do this for the fun (that's the way I see it), but a printing service takes that in consideration and the price goes way up.

Now I'm up with another option, but I still need to gather more details about it, because it is a big step.
We will see in a few weeks if this new plan is viable. 

In the meantime, I started to work on a leg for the fun.